Getting started
The CheckMarket Survey API uses custom HTTP headers for authentication. For the full details, see the specific section regarding the Authentication Headers. In this example we will use the default API request to get the HATEOAS for the root requests. We have created a short example in cUrl and C#.NET.
1. Create your api keys
Before you can start using our API, you have to create your own keys. This can be done in the Keys section.
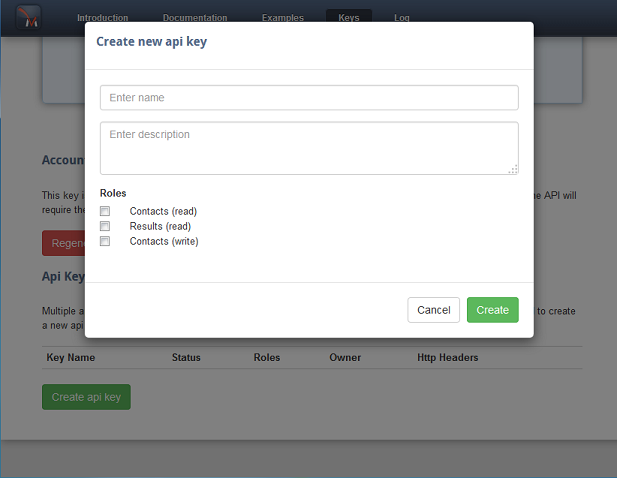
On this screen you can choose a name as a short reference and a description to explain the purpose of the key. You can define the relevant access rights depending on the request you plan to use. Some API calls (for instance the lookup requests) don't require any special roles. For other API calls, the required roles are indicated in the API Reference. You can change these settings at any time in the future without risking the actual key value will change.
We recommend to limit the access rights to your exact needs, and we recommend to a seperate key for each internal intention. For instance, a reporting page in your CRM should get a seperate key then a data transfer process which is used to add contacts to the CheckMarket platform.
2. Get the keys from our developer platform
After creating an API key, we will show the MasterKey and Key.
- The MasterKey is always the same. After changing the MasterKey, all request related to your account will require the new MasterKey. You can regenerate the MasterKey regularly to improve security, but you should be aware this has an impact on all API request from your internal applications and from the CheckMarket Notifications.
- The Key is always different. You can't regenerate a Key because of tracability. You can give a key the status "Inactive". Once a key is inactive, it won't be possible anymore to authenticate using this key. But any requests are still logged, this allows you to check if the key is still used or not in the Log section.
To retrieve the created master key and key, you can copy the tooltip and paste it in your code.

3. Use TLS 1.2
TLS 1.0 is considered to by unsafe, that's why we don't support it in our API. We highly recommend to use TLS1.2.
Some clients need some additional logic to support TLS 1.2:
- cURL: the option
--tlsv1.2forces curl to use TLS version 1.2 - .NET: .NET framework 4.7 use the default as configured in your OS, lower versions can be forced to prioritize TLS 1.2 with
ServicePointManager.SecurityProtocol = SecurityProtocolType.Tls12;
4. Execute your first api request
In this example we perform the default API request which will return the HATEOAS for the root request. For this request no special roles are required so you should always get a result back. Depending on the tool or development platform you are using, you should pass the HTTP headers in a different way. Currently we have provided an example in cURL and C#.NET.
curl https://api-eu.agileresearch.medallia.com/3 -k -H "X-Master-Key:{MasterKey}" -H "X-Key:{Key}"
Response
{
	"Meta" : {
		"Status" : 200,
		"Timestamp" : "2024-04-20T10:16:05.7978685Z"
	},
	"Links" : {
		"Other" : [{
				"Href" : "https://api-eu.agileresearch.medallia.com/3/surveys",
				"Title" : "Surveys",
				"Method" : "GET"
			}, {
				"Href" : "https://api-eu.agileresearch.medallia.com/3/contactgroups",
				"Title" : "ContactGroups",
				"Method" : "GET"
			}, {
				"Href" : "https://api-eu.agileresearch.medallia.com/3/lookup",
				"Title" : "Lookup",
				"Method" : "GET"
			}, {
				"Href" : "https://api-eu.agileresearch.medallia.com/3/contactfolders",
				"Title" : "ContactFolders",
				"Method" : "GET"
			}
		]
	}
}
System.Net.Http.HttpClient client = new System.Net.Http.HttpClient();
client.BaseAddress = new Uri("https://api-eu.agileresearch.medallia.com/");
client.DefaultRequestHeaders.Add("X-Master-Key", "{MasterKey}");
client.DefaultRequestHeaders.Add("X-Key", "{Key}");
System.Net.Http.HttpResponseMessage response = client.GetAsync("/3").Result;
Response
{
	"Meta" : {
		"Status" : 200,
		"Timestamp" : "2024-04-20T10:16:05.7978685Z"
	},
	"Links" : {
		"Other" : [{
				"Href" : "https://api-eu.agileresearch.medallia.com/3/surveys",
				"Title" : "Surveys",
				"Method" : "GET"
			}, {
				"Href" : "https://api-eu.agileresearch.medallia.com/3/contactgroups",
				"Title" : "ContactGroups",
				"Method" : "GET"
			}, {
				"Href" : "https://api-eu.agileresearch.medallia.com/3/lookup",
				"Title" : "Lookup",
				"Method" : "GET"
			}, {
				"Href" : "https://api-eu.agileresearch.medallia.com/3/contactfolders",
				"Title" : "ContactFolders",
				"Method" : "GET"
			}
		]
	}
}
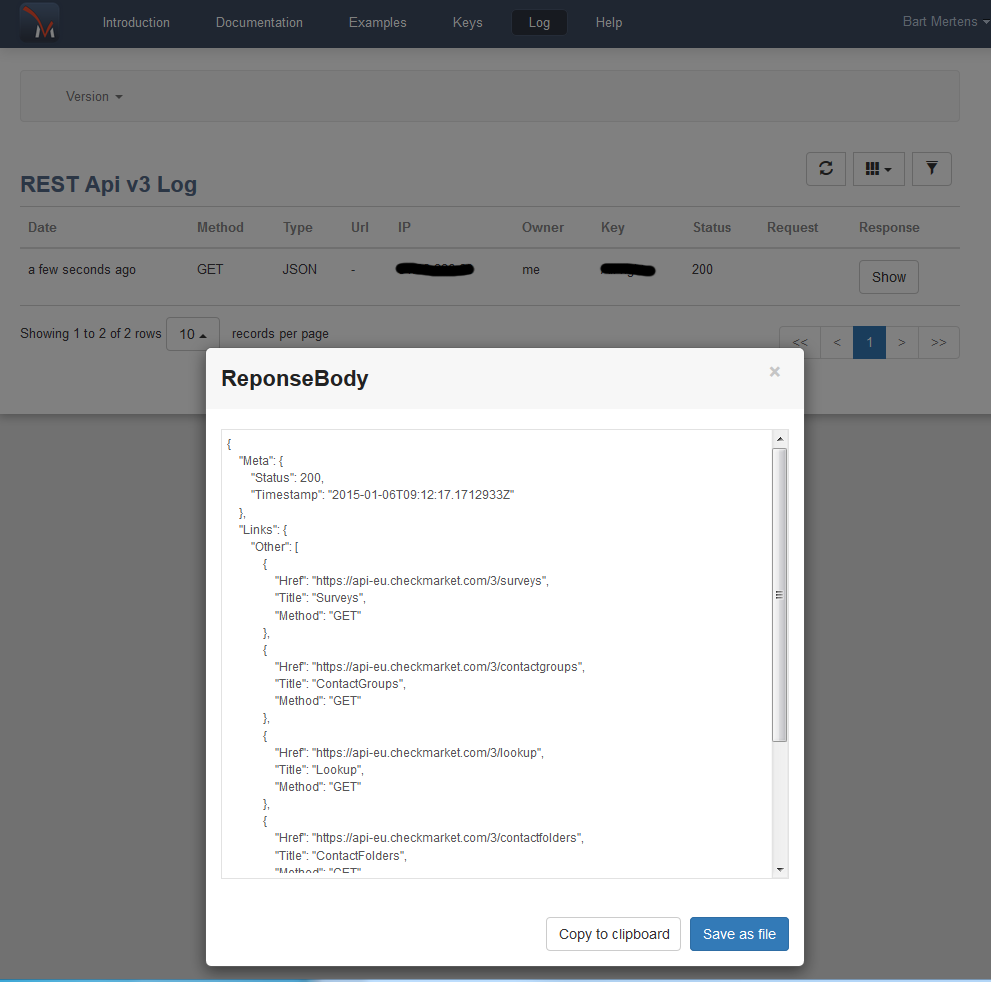
5. Check the log on our developer platform
Each call to our survey API is logged, we keep track of the used request, the specified content-type, the requesting ip address and the key which has been used. Additionaly you can also view the response. You can view the logged request in the log section where you can filter on
Since we keep track of the key which has been used, the authentication must be successfull before we can show you the entry in our log section. If a certain key is not authorized to perform a request, you will see the entry in the logfile.
Congratulations, now you are ready to start discovering our survey API!
Or you can continue to the next example and let us show you some amazing possibilities...